

Preparing the top – and a little problem!
Before the top can be attached to the body, there are a few more things to do. First, decide how […]
Preparing the top – and a little problem! Read Post »
Before the top can be attached to the body, there are a few more things to do. First, decide how […]
Preparing the top – and a little problem! Read Post »
John is a licensed radio amateur, with callsign GM8OTI. The old website has a lot of information posted: http://www.marwynandjohn.org.uk/amateurradio.html When
Played fiddle with the Greenbank Buskers for a ceilidh this evening. Good fun as always, plenty dancing! Now relaxing watching
Greenbank Buskers – another ceilidh Read Post »
I had a day messing about with software. The hard disk on my ancient Toshiba R100 laptop (2003, mainly used
Keeping the old laptop alive Read Post »
Family and friends coming across this website might realise that it’s a new one! We have had our old website

Harpacam photos from another great session in the Steam Packet Inn, Isle of Whithorn, with a lovely bunch of musicians.
Steam Packet session Read Post »
A link to Olov Johansson’s post about his new Esbjörn Hogmark nyckelharpa – so I don’t lose it! Thanks for
Olov Johansson’s new nyckelharpa Read Post »
I first heard the nyckelharpa a long time ago (maybe 30 years?) in the Queen’s Hall, Edinburgh. Two Swedish nyckelharpa
Why the nyckelharpa? Read Post »

After a lot of work planing the piece selected for the top to thickness (about 3.5 to 4mm), it was
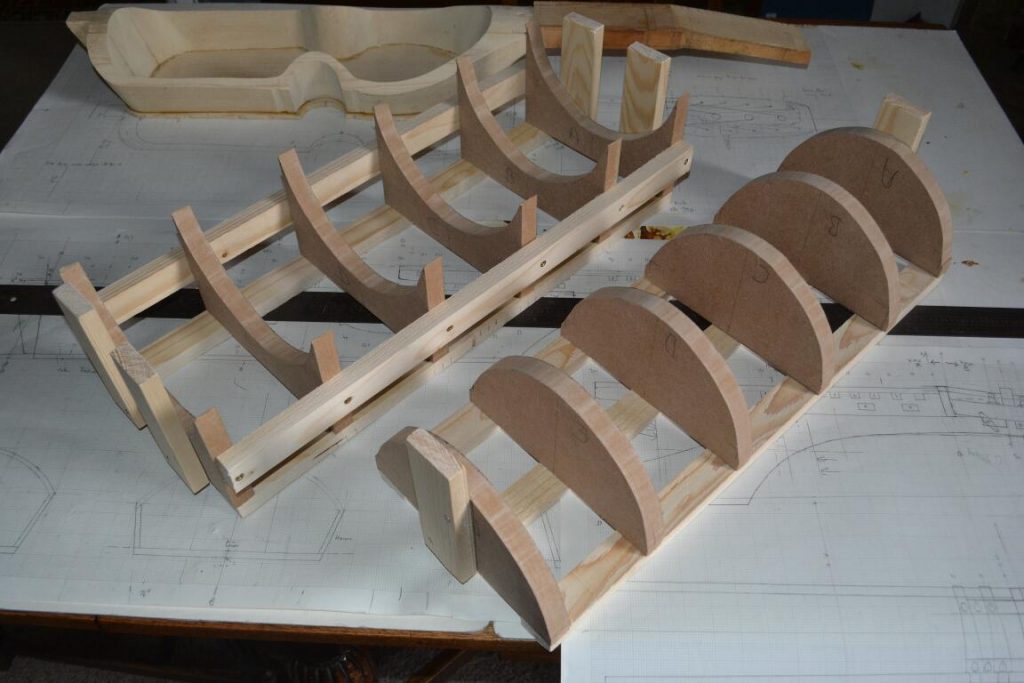
Originally I thought I would make the top from glued pieces, and cut it out to shape with chisels and
Preparations for steaming Read Post »

Of course, when a nyckelharpa key was beginning to stick on Sunday morning at Halsway I should have got Olle
New nyckelharpa key tangent Read Post »

Fantastic weekend at Halsway! I think this was at the Friday pre dinner session. Thanks Linda 🙂 What a wonderful weekend!

Home via Wigan to do some clock repairs – not quite working yet – hopefully to be finished on the
